• Skip to primary navigation
  • Skip to main content
  • Skip to primary sidebar

Feisty Tapas logo

  • Home
  • Instant Pot
    • Instant Pot Recipes
    • Instant Pot Duo Crisp Recipes
    • Instant Pot Tips and Tricks
  • Thermomix Recipes
  • Recipes with both Thermomix & Instant Pot
  • Air Fryer
  • Gadget-Free Recipes
  • About
  • Newsletter
  • Instant Pot® UK Community Recipe Index
menu icon
go to homepage
  • Pressure Cooker
  • Air Fryer
  • Thermomix
  • About
    • E-mail
    • Facebook
    • Instagram
    • Pinterest
    • YouTube
  • search icon
    Homepage link
    • Pressure Cooker
    • Air Fryer
    • Thermomix
    • About
    • E-mail
    • Facebook
    • Instagram
    • Pinterest
    • YouTube
  • ×
    Home » Instant Pot

    Pressure Cooker Egg Fried Rice-ish

    Published: Oct 13, 2021 by Maria Bravo · This post may contain affiliate links · Leave a Comment

    Jump to Recipe

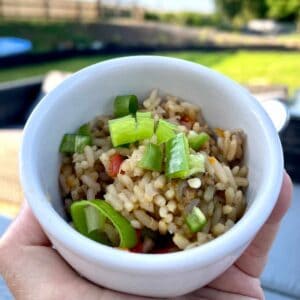
    This Pressure Cooker Egg Fried Rice-ish is super versatile and allows you to use up a ton of ingredients that may be about to go off.

    Pressure Cooker Egg Fried Rice - Savoury Rice

    Okay, so it's not quite Egg Fried Rice. Hence calling it Pressure Cooker Egg Fried Rice-ish.

    And it's not quite Savoury Rice. Hence not calling it that.

    But it can be either or!

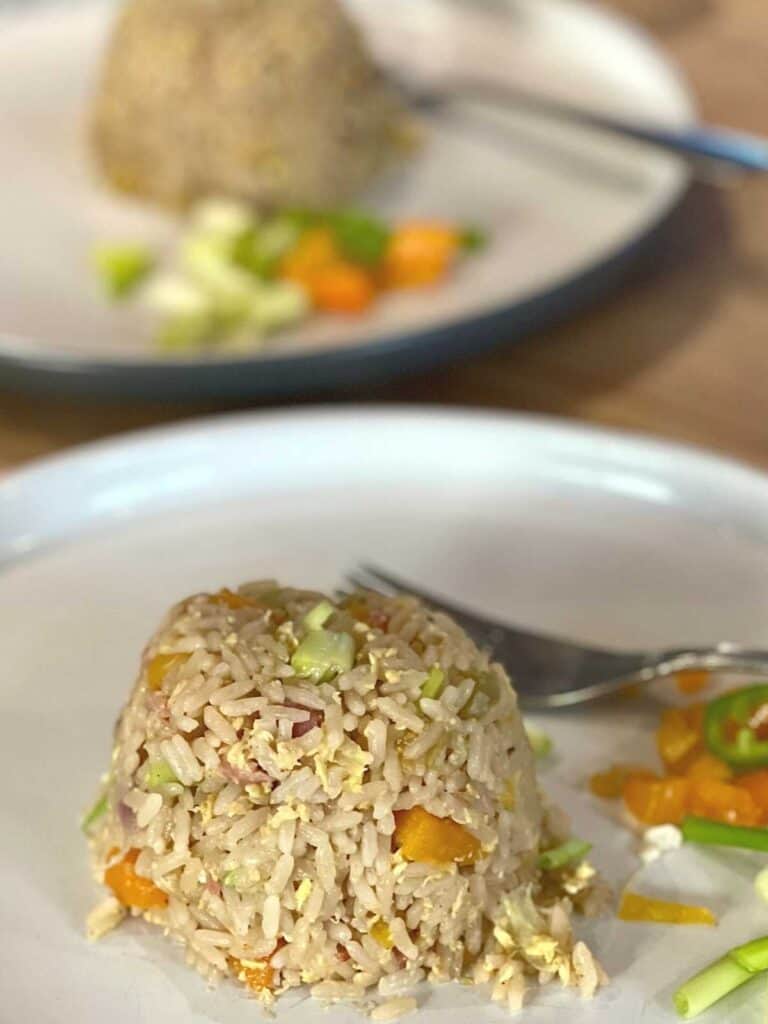
    Because, as you can see from the photos, I have tried it without adding the egg at the end and it's still delicious.

    If you haven't made my Vegetable Stock Paste yet, dishes like this one are perfect for it.

    Jump to:
    • Ingredients
    • Instructions
    • Substitutions
    • How to chill the cooked rice to eat over the next few days?
    • 📖 Recipe

    Ingredients

    • bacon
    • red onion
    • celery
    • pepper
    • carrot
    • Chinese five spice
    • soy sauce
    • rice
    • stock

    See recipe card below for quantities

    Instructions

    Sauté the ingredients.

    Pressure Cooker Egg Fried Rice-ish - rice and all ingredients apart from the water in the Instant Pot's stainless steel inner pot

    Add the stock.

    2. Pressure Cooker Egg Fried Rice-ish - rice and all ingredients including the water in the stainless steel inner pot

    Lid on. Steam release set to Sealing. Pressure cook.

    Pressure Cooker Egg Fried Rice-ish - right after pressure cooking, still in the inner pot

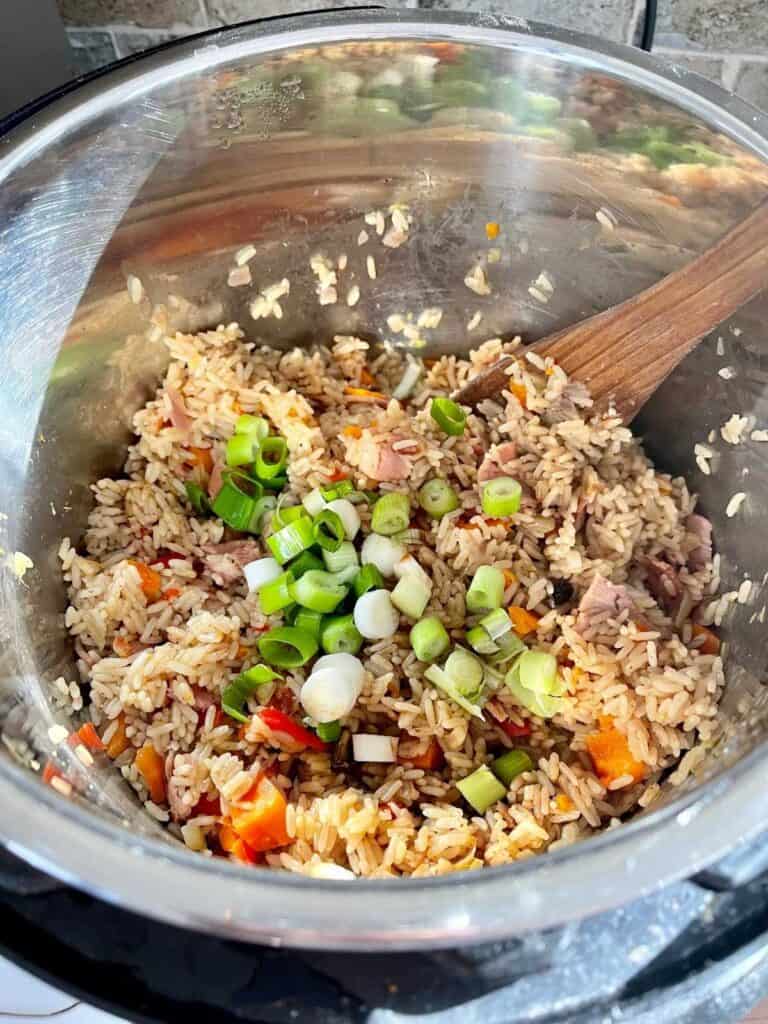
    Adjust the soy sauce to taste (you may want to add a bit more), stir in the spring onions

    Pressure Cooker Egg Fried Rice-ish - Savoury rice- with spring onions - still in the inner pot

    Substitutions

    You can use any vegetables you want and I encourage you to use anything that you have in the fridge:

    • cauliflower florets
    • peas
    • shredded cabbage

    Think of this rice as one of those blended soups where you cook everything you have left in the fridge.

    This is the same, just in a rice dish and it's so easy to have the rice and vegetable stock paste ready to pressure cook it.

    No eggs? Don't worry, it will be delicious without, more of a yummy savoury rice and who doesn't like that?

    Plus, it's super quick.

    How to chill the cooked rice to eat over the next few days?

    Cool down the rice as soon as you can.

    This can be sped up by placing the inner pot in the sink and filling the sink with cold water all around it.

    Just don't take your eye off it as you don't want the water going inside the inner pot where your lovely freshly cooked rice is.

    Use a wooden spoon to stir the rice regularly. This will help let the steam out faster.

    Tip: Set a timer for 10 minutes so that you don't forget it's there and check if it's cooled down enough.

    Then into the fridge as soon as you can and preferably within half an hour.

    Make sure it's piping hot when you reheat it.

    It makes a great desk lunch!

    This dish will work whatever pressure cooker you have, whether stove-top or electric. I tend to cook it in an Instant Pot or Ninja Foodi. It works great in both.

    Join my Pressure Cooking UK with Feisty Tapas Facebook group

    📖 Recipe

    The green tops of the salad onions stand out on top of the Pressure Coooker Egg Fried Rice-ish, which is in a small bowl being held up by a hand with a sunny garden in the background

    Pressure Cooker Egg Fried Rice-ish

    Maria Bravo
    Delicious, easy and super quick sort of Egg Fried Rice recipe
    Print Recipe Pin Recipe Save Recipe Recipe Saved!
    Prevent your screen from going dark
    Prep Time 15 minutes mins
    Cook Time 4 minutes mins
    Course Main Course, Side Dish
    Cuisine Chinese
    Servings 6 people
    Calories 316 kcal

    Equipment

    • Pressure cooker / Instant Pot / Multicooker

    Ingredients
      

    • 4-5 chopped rashers of bacon chopped up
    • 1 red onion chopped
    • 1 stalk of celery chopped (I chop it really small)
    • 1 yellow pepper chopped
    • 2 medium carrots chopped
    • 1 teaspoon Chinese five spice
    • 1 tablespoon soy sauce
    • 1.5 mug of quick cook white basmati (300 g) it’s what my friend had in the cupboard, you can use normal white basmati or long grain, of course (timings in recipe). Grab a standard-sized mug, any mug.
    • 1.5 mug filled with water (300ml) we’re using a 1:1 ratio rice to water (use the same mug as for the rice to keep the same ratio)
    • 1 chicken stock cube or 1 heaped teaspoon of my homemade vegetable stock paste

    To serve

    • 4 eggs beaten
    • 6-7 spring onions
    • Fresh chillies chopped or sliced (optional)

    Instructions
     

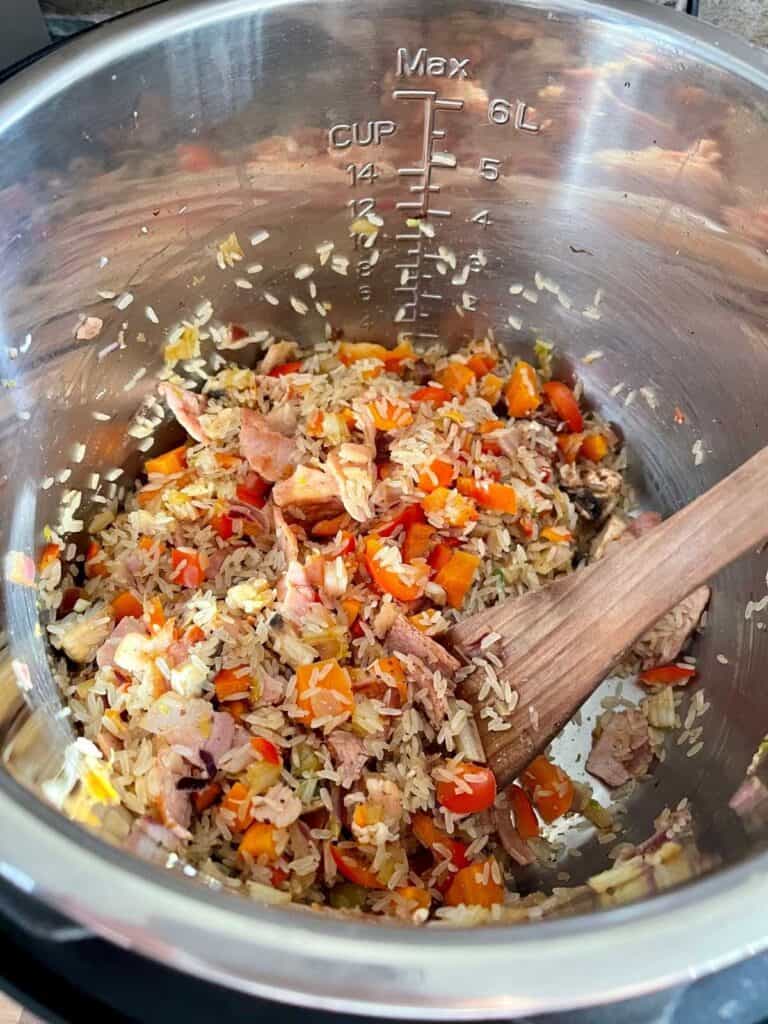
    • Press Sauté and fry the chopped bacon in some olive oil. Moving it so that it doesn’t catch.
      4-5 chopped rashers of bacon
    • Stir in the vegetables and sauté for a few minutes.
      1 red onion, 1 stalk of celery, 1 yellow pepper, 2 medium carrots
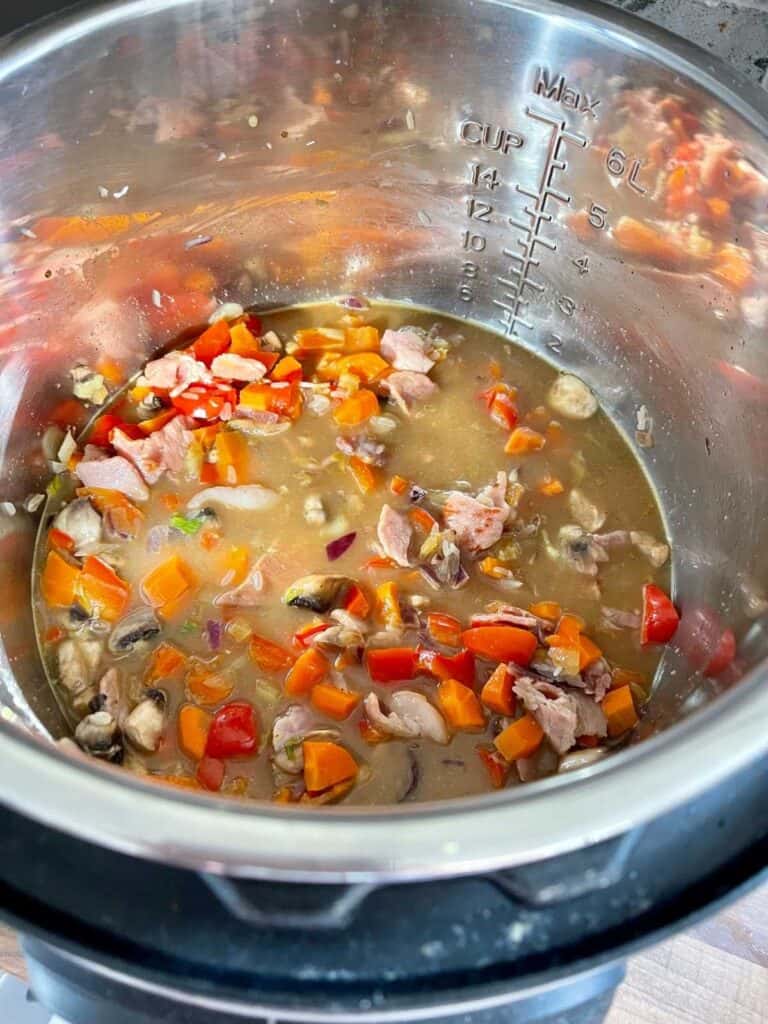
    • Deglaze well (i.e. add a bit of liquid and scrape with a wooden spoon to remove any caramelised/burnt-on bits).
    • Stir in the Chinese five spice, soy sauce, rice, water and stock cube or stock paste.
      1 teaspoon Chinese five spice, 1 tablespoon soy sauce, 1.5 mug of quick cook white basmati (300 g), 1.5 mug filled with water (300ml), 1 chicken stock cube
    • Make sure the sealing ring is in place properly. Lock the lid in. Steam release set to Sealing.
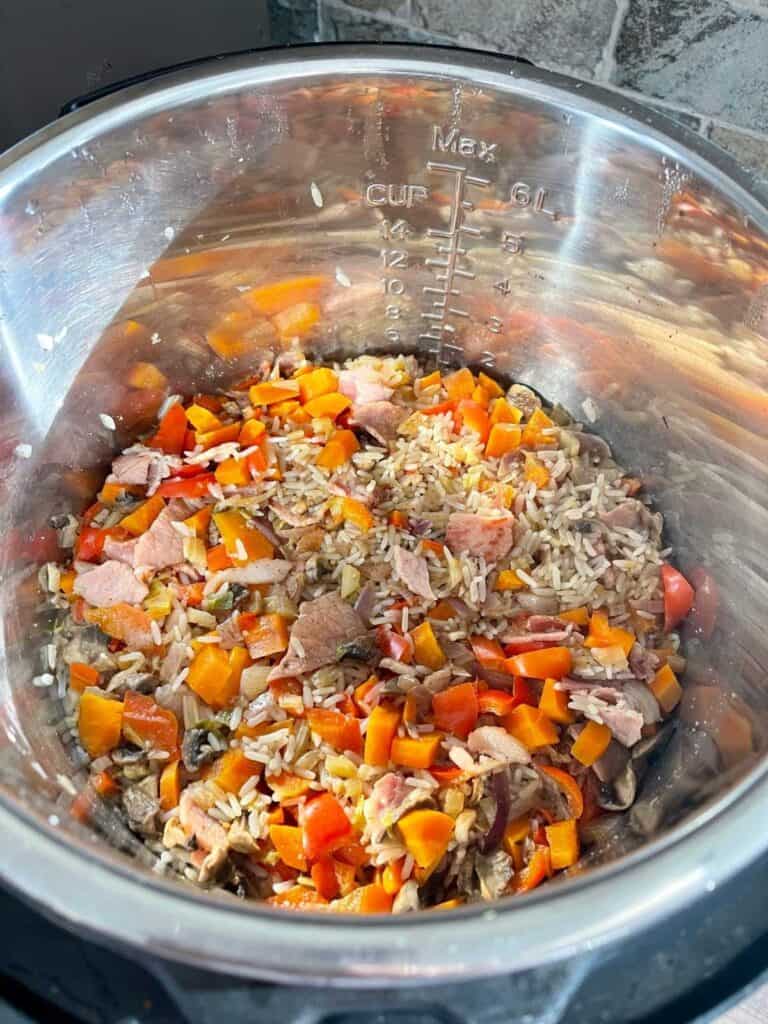
    • Pressure Cook 4 minutes, high pressure. If it’s quick cook rice, do a 2 minute QPR at the end, if it’s normal basmati do a 7 minute QPR at the end).
    • Once you have opened the lid, stir in the beaten eggs, keep stirring until you see the eggs have cooked.
      4 eggs
    • Adjust the soy sauce to taste
    • Serve with the spring onions and chillies
      6-7 spring onions, Fresh chillies

    Notes

    *Pressure Cooker Terminology
    Quick Pressure Release (QPR, also called quick release or QR) means venting the steam as soon as the pressure cooking process finishes, i.e. moving the steam release handle from Sealing to Venting.
    Natural Pressure Release (NPR, also called natural release or NR) means letting the float valve pop back down of its own accord, so basically you don’t need to do anything at the end and can keep your feet up. If it takes over 15 minutes, you're ok to release the rest of the steam (by turning the steam release handle to Venting) that may be left in order to unlock and open the lid. 
    Sometimes you'll see me talk of a combination of NPR followed by a QPR. For example a recipe may have a 4 minute NPR followed by a QPR. You wait for 4 minutes at the end of the pressure cooking time and then do a QPR by moving the steam release handle from Sealing to Venting.

    Nutrition

    Calories: 316kcalCarbohydrates: 47gProtein: 10gFat: 9gSaturated Fat: 3gPolyunsaturated Fat: 2gMonounsaturated Fat: 4gTrans Fat: 1gCholesterol: 119mgSodium: 488mgPotassium: 314mgFiber: 2gSugar: 2gVitamin A: 3725IUVitamin C: 41mgCalcium: 61mgIron: 2mg
    Keyword bacon, basmati rice, five spice
    Tried this recipe?Mention @feistytapas or tag #feistytapas!
    Share on Facebook

    You'll also love these other pressure cooked rice recipes:

    • Risotto
    • Gammon Rice
    • Seafood Rice
    • Vegan Mushroom Stew
    • Air Fryer Fajita Chicken

    Tried this recipe? Let me know over on my social media channels or in the comments below,

    Maria

    • Facebook
    • Instagram
    • YouTube
    • Pinterest
    4

    More All of the Feisty Tapas Instant Pot recipes in one place

    • Photo of the homemade Clotted Cream being drained after chilling
      Easy Instant Pot Clotted Cream
    • Photo of pressure cooked haggis on a white plate with an Instant Pot Duo in the background
      How to pressure cook Haggis
    • Photo of a Christmas Pudding sitting on the greaseproof paper it was previously wrapped in
      How to reheat Christmas Pudding in a Pressure Cooker
    • Photo of an Instant Pot Duo with the Steam button lit up and the words HOW TO STEAM IN A PRESSURE COOKER OR INSTANT POT written over it
      How to steam in an Instant Pot electric pressure cooker

    About Maria Bravo

    Kitchen Gadget Geek extraordinaire. Tester of all things kitchen appliance. Clumsy cook, if I can't break it and get the most of it, you know that's a good kitchen gadget! Architect of online communities for kitchen gadget lovers

    Reader Interactions

    Leave a Reply Cancel reply

    Your email address will not be published. Required fields are marked *

    Recipe Rating


    Primary Sidebar

    Hi, I'm Maria! A food blogger passionate about kitchen gadgets and their power to make life easier and tastier.

    More about me →

    Popular

    • Photo of a white rectangular enamel dish full of cheesy loaded nachos
      Loaded Air Fryer Nachos - Quick, Cheesy and totally Moreish
    • Photo from above of the Quick Chilli for Nachos in the Thermomix seen after air frying over tortilla chips in the Ninja Speedi
      Ninja Speedi Nachos
    • Photo of the bean chilli seen inside the bowl of the Ninja Speedi
      Ninja Speedi Bean Chilli - Perfect for a quick and tasty dinner
    • Photo from above of Nachos air fried in the Ninja Speedi on a liner using a quick bean chilli made in the Thermomix
      Quick Bean Chilli for Nachos in the Thermomix

    Footer

    ↑ back to top

    As an Amazon Associate I earn from qualifying purchases.

    About Maria

    • Privacy Policy

    Newsletter

    • Sign Up! for emails and updates

    Copyright © 2011-2025

    Copyright © 2025 Feisty Tapas on the Cravings Pro Theme