
Easy, juicy Air Fryer Whole Roast Chicken & Gravy cooked in the air fryer at the end too! Your Sunday roast made easier with very little electricity consumption.

I've been using air fryers for 5 years. I started with my Philips air fryer, went on to the Instant Vortex 4 in 1 5.7 litre that I have used in this recipe and now I've lost count of how many I have!
That's to say that, after 5 years, I can say hand on heart that using an air fryer instead of an oven will save you money not just on your energy bills.
For me this is not a fad or the latest gadget. It also doesn't need charts or anything. Quite simply, it saves you money that you recoup quite quickly after purchase.
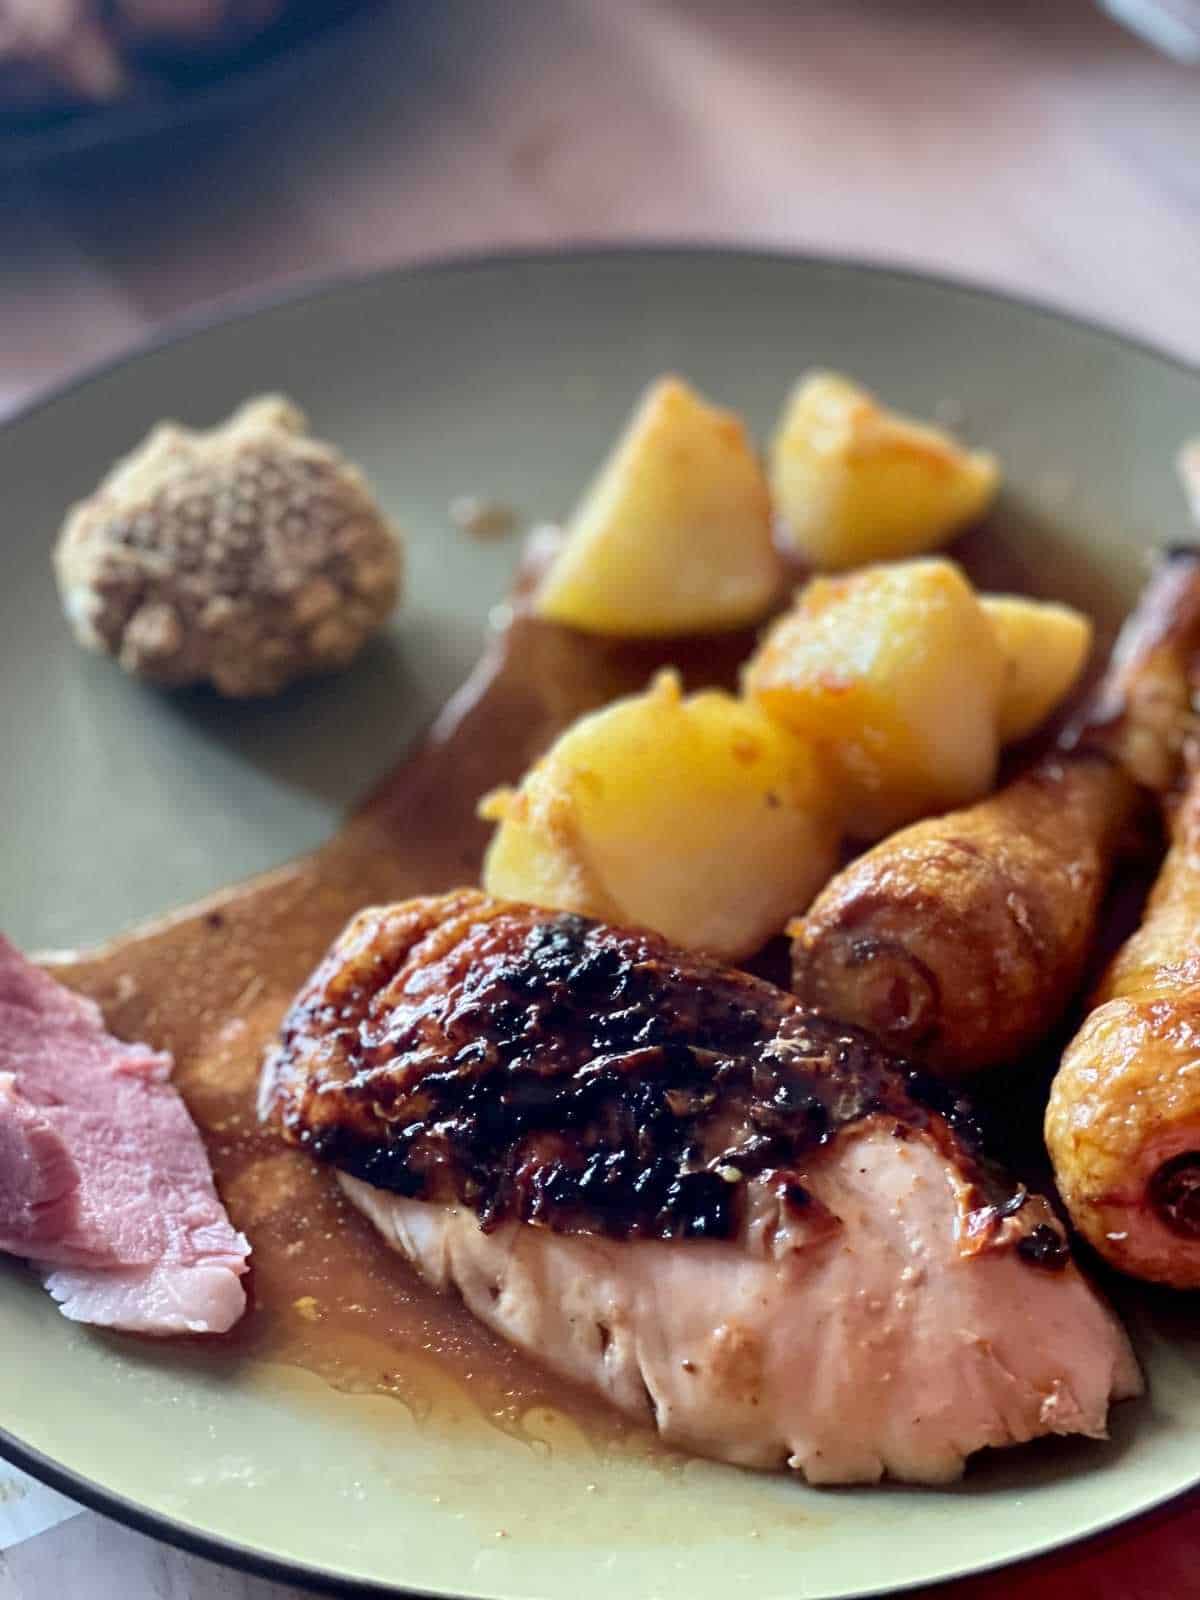
This would be delicious with Greek Roast Potatoes, Parsnips and, yes, even Brussels sprouts. Let's not forget the gammon, of course and the Stuffing. You might also love our Pressure Cooker Carrot and Swede Mash (Carrot and Rutabaga Mash). Want Roast Beef instead? Try our Roast Beef Dinner in your air fryer.
Jump to:
📖 Recipe
Air Fryer Whole Roast Chicken and Gravy
Equipment
- 1 Air fryer I used the Instant Vortex 4 in 1, 5.7 l
Ingredients
- 1.9 kg chicken untrussed so that it's flatter
- Unsalted butter only a few slices to add under the chicken's skin or dairy free spread (I love Pure Buttery)
- 1 teaspoon extra virgin olive oil or oil of your choice
- Salt and pepper
Glaze
- 1 lemon juiced and zested, mine was a huge lemon so I used half of the juice but all of the zest
- 1 tablespoon honey
Gravy
- 50 g passata add more or less to taste (you can also use ketchup)
- 300 ml stock I used gammon stock as that's what I had
- You could use red or white wine but I didn't have any
Other things you could add:
- Whole garlic cloves or a whole head of garlic
- vegetables around the chicken (not so much underneath if there isn't enough height
Instructions
Prepare
- Start by zesting the lemon and squeezing the juice out then popping what's left of the lemon in the cavity of the chicken.
- Add a few thin slices of butter between the skin and the breast of the chicken. Give it a good rub now, go on!!
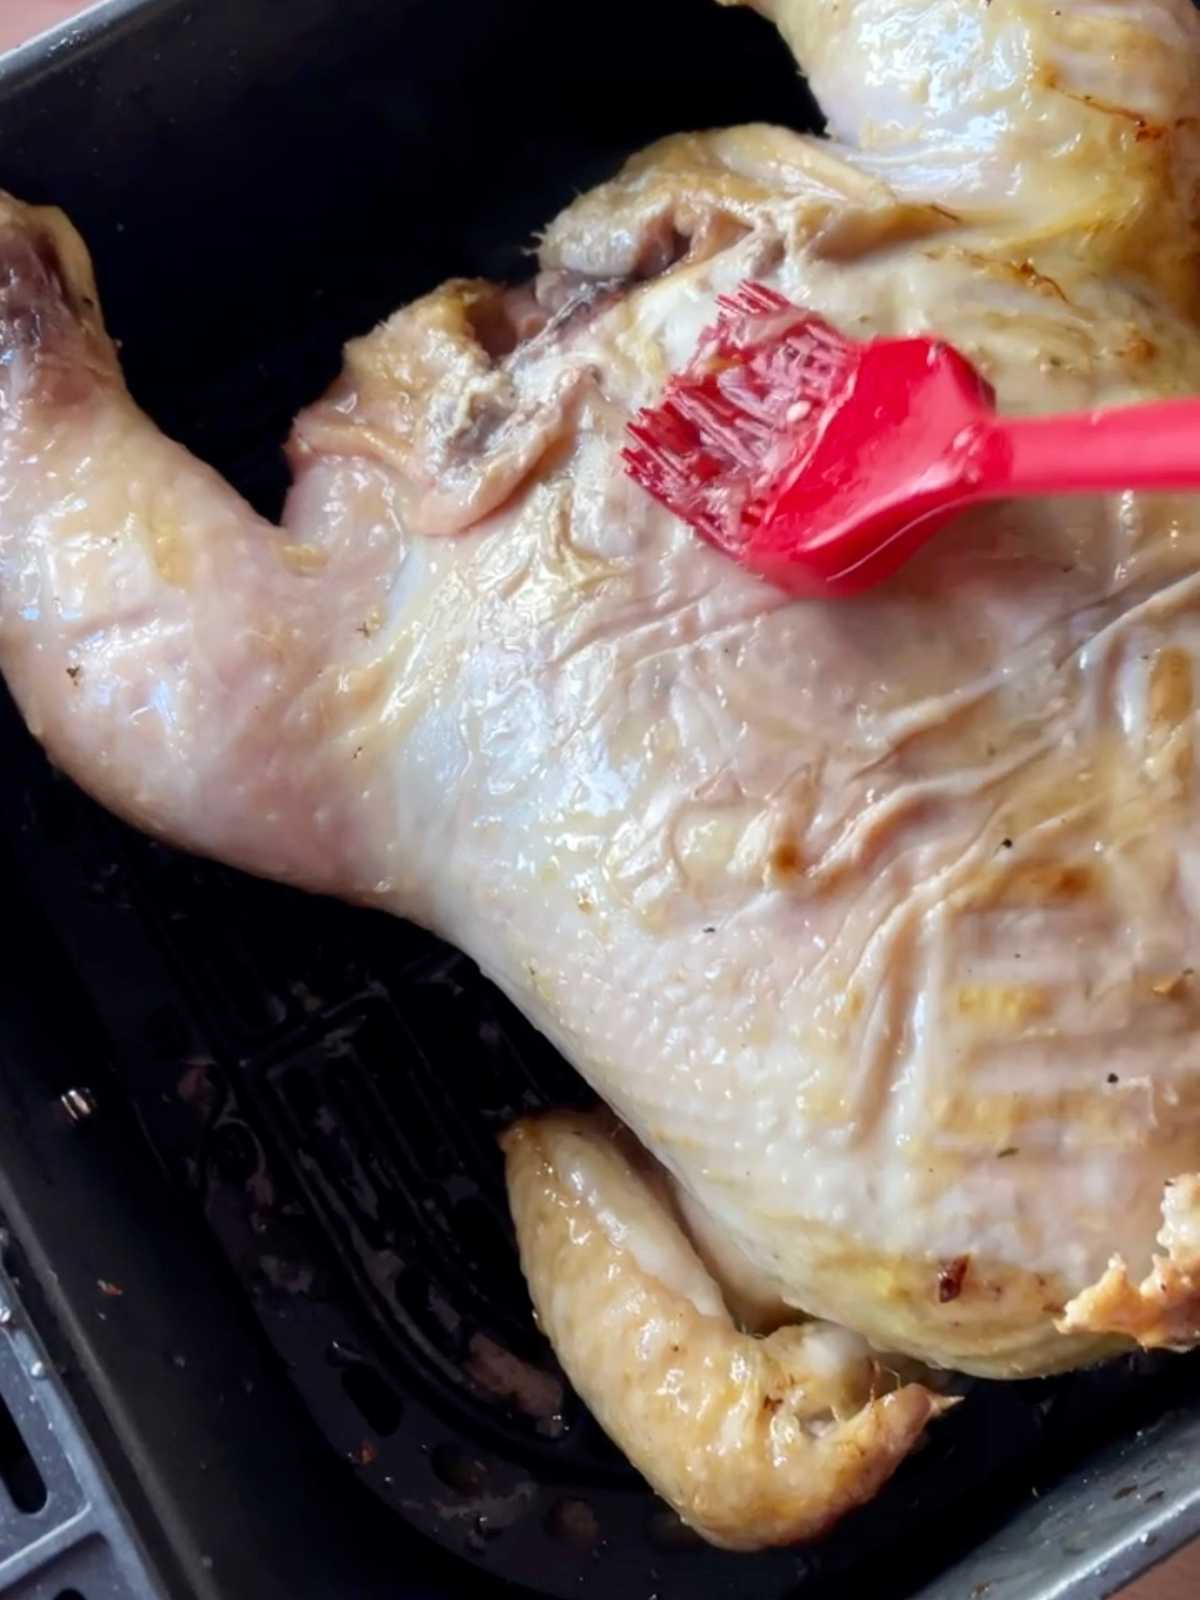
- Place the chicken breast side down in the air fryer basket or drawer. Pour a bit of the oil into a ramekin. Dip the silicone brush in the oil and spread it all over the visible parts of the chicken. Then sprinkle a bit of the lemon zest, only a pinch and sprinkle or rub in some salt and pepper.
- Air fry: 25 minutes at 170ºC, from cold (340F if you're in the States).The Vortex air fryer has an initial built-in preheating phase that adds a few minutes to the cooking time as the countdown does not start straight away so, if using an air fryer that starts counting down immediately, make sure you add 2-3 minutes to the time.
- In the meantime, prepare the glaze by mixing the lemon juice with the honey. Tip: if your honey is not quite runny and it has crystallised, place the mix into the microwave for about 10 seconds and stir.
- With 15 minutes of air frying time to go, add a bit of the glaze to the chicken. Then again with 5 minutes to go.
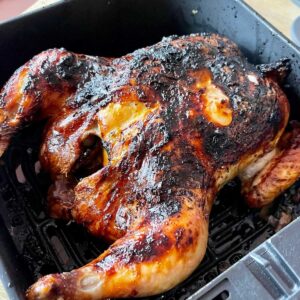
- Once the timer ends, very carefully turn the chicken over so it's breast-side up. Brush some more of the glaze and sprinkle some more of the lemon zest all over the visible parts and programme: 20 minutes at 180ºC (356F if you're in the States).
- Open the air fryer a couple of times to brush over the rest of the glaze and add the rest of the lemon zest. Say with 12 minutes to go and with 6 minutes to go.
- At the end, don't worry if you're juggling other things, it can rest in there for a few minutes. Check it has cooked through with a meat thermometer, it's worth investing in one, see the blurb for my recommendations. Not quite cooked yet? Add time at 180ºC but only 3-5 minutes at a time and check as it cooks fast.
- Remove the chicken and let it rest, no need to cover it but you can cover it with foil if you want.
- Time to prepare the gravy, carefully remove the grill and leave the juices in the drawer to make gravy. Add ketchup or passata and some stock (I used gammon stock). Stir well with a silicone spatula and cook for 5 minutes or so at 130ºC / 266 F while you get everything organised.
Notes
Ingredients
- a whole chicken
- butter or dairy free spread
- lemon
- honey
- stock
- passata
See recipe card for quantities.
I need it to be dairy-free, do I have to add the butter?
I can recommend using Pure Buttery dairy free spread as it's really good.
The butter helps with the juiciness but you can skip it, just make sure you don't forget to brush the oil as that will help.
Do I have to glaze it?
No, but this particular glaze makes it so juicy!
Try it without the glaze too or play with adding herbs.
What you really want are the timings for air frying a whole roast chicken and these really work!
What if my chicken doesn't fit?
Try spatchcocking it but keep an eye on timings as you may need to reduce them, it may cook faster.
Much smaller chicken than the recipe states?
Reduce both the breast-side down and the breast-side up cooking times by 5 minutes each and then check with a thermometer to make sure it's cooked through.
Don't forget: you can add time but you can't take it away. Once overcooked and dry, it's overcooked and dry!
Whereas if it's not quite there, you can add time.
Can I add vegetables so that I have them for the gravy?
Yes, you can. In fact, I would add a whole head of garlic and then squeezed it out when you're making the gravy afterwards and stir the roasted garlic into the gravy.
That said, if you add vegetables like carrots, try not to waste them, try blending them into the gravy at the end.

Equipment
Air fryer: I used the Instant Vortex 4 in 1 5.7 litre for this. You would need a slightly smaller chicken for the Cosori 5.5 l as the basket reduces the usable space
Meat thermometer: there are many types of meat thermometers but even a fairly basic one will give you peace of mind. All you have to do is stab the chicken in the thickest part with it and make sure it's at 75ºC or over.
If you have seen my Zero Minute Chicken video, you'll know that in my case this means stabbing it in several parts until I know for sure it's over 75ºC in many places to make sure.
If you want one of the best meat thermometers out there and have the budget, look for the Meater Plus (it has to be the Plus).
I don't have the Meater Plus but I do run a Kitchen Gadgetry with Feisty Tapas group on Facebook where it is declared THE thermometer to have by my lovely members.
Storage
Eat within 3 days. Use the carcass to do chicken stock in your pressure cooker (ask me how while I don't have the recipe up).
Food safety
A few tips from me:
- Always wash your hands straight after touching raw meat
- Same with your knives, boards and utensils, use separate ones for raw meat and wash them well before using for anything else
- Don't leave food at room temperature for extended periods, always cool down quickly and chill or freeze as soon as you can
- Always chill left over rice as soon as you can and always within half an hour.
See more guidelines at food.gov.uk.
I can't wait to see what variations you come up with!
20
Leave a Reply